
How to Artificially Age Wood for Rustic Farm Shades of Brown or Dark Ebonized Finishes
- J V
- Apr 11, 2025
- 3 min read

Updated: Aug 11, 2025

Looking to give your wood projects an aged, weathered look without spending a fortune on commercial stains? At Knoxville Custom Homes, we love using simple, eco-friendly methods to create beautiful finishes with character. In this DIY guide, we’ll walk you through how to artificially age wood using common household items to achieve a rustic, farm-style appearance.
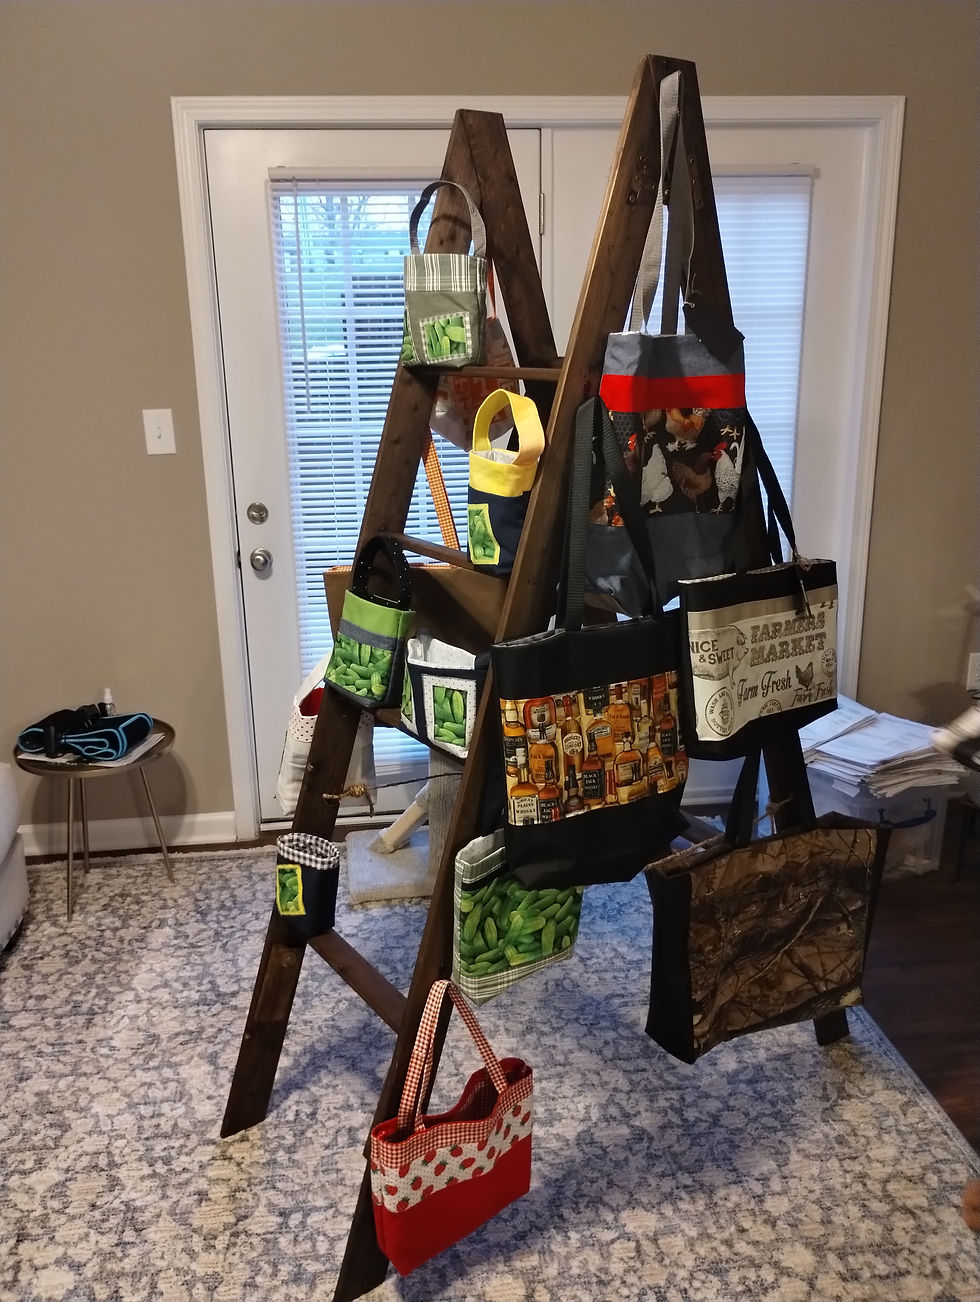
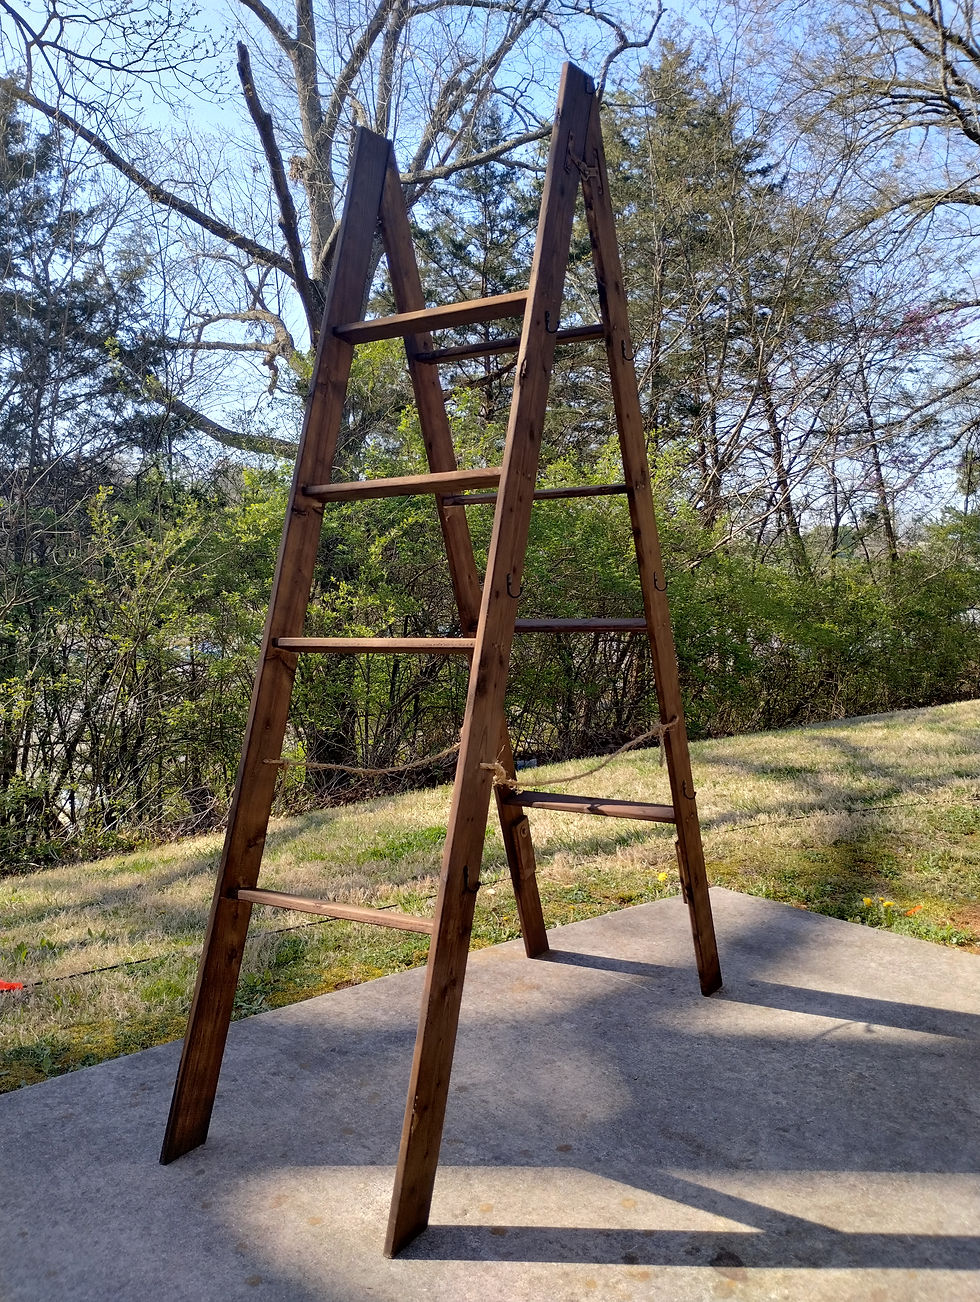
We recently used this technique on a custom, collapsible ladder-style display rack built for a client who wanted a lightweight, easy-to-carry rack for her handmade handbags and totes. The goal? Something that looked like it had been found in a barn in the 1800s—handcrafted, worn, but still practical and charming.
What Is Oxidizing or Ebonizing Wood?
Oxidizing wood—also known as ebonizing or using a "steel wool and vinegar stain"—is a chemical staining process that reacts with the tannins in wood to naturally darken it. Unlike store-bought stains that sit on top of the wood, this method chemically alters the surface, creating a truly aged appearance with rich, natural tones. Best of all, you can do it safely with materials you probably already have at home.
Materials You’ll Need:

Raw wood (Birch, Maple, Oak, etc.)
Ultra-fine steel wool (#0000) – available in the paint section of most hardware stores
Distilled white vinegar
Black tea (regular breakfast tea works great)
Mason jar (for the stain mixture)
120-grit sandpaper
Cheap paintbrush
Rags
Optional: Hydrogen peroxide (to speed up the process)
Spray bottle or HVLP gun (for larger projects)
Step-by-Step Instructions
Step 1: Brew the Black Tea
Start by steeping 3–4 bags of black tea in boiling water. Let it steep for at least an hour—longer is fine. The tea introduces tannins into woods that don’t naturally have a lot, like birch or maple. If you’re working with high-tannin woods like oak or walnut, you can skip this step.
Step 2: Make the Vinegar & Steel Wool Stain
Place a piece of ultra-fine steel wool in a mason jar and cover it with white vinegar.
Let it sit for 3–4 days. Leave the lid loose to allow gas to escape.
To speed things up:
Remove the steel wool twice for 30 minutes to expose it to air.
Add a tablespoon of hydrogen peroxide to accelerate rusting. (Be careful—too much can heat the mixture.)
After 24 hours with peroxide and airing, our mixture was ready for use.
Step 3: Prepare Your Wood
Lightly sand the wood with 120-grit sandpaper to open up the grain.
Test your stain on a scrap piece first.
Apply the black tea with a brush and allow it to fully dry. This preps the wood by enriching it with tannins.
Lightly sand again once dry to knock down any raised grain.
Apply a second coat of tea if needed, and let it dry completely.
Step 4: Apply the Vinegar Mixture
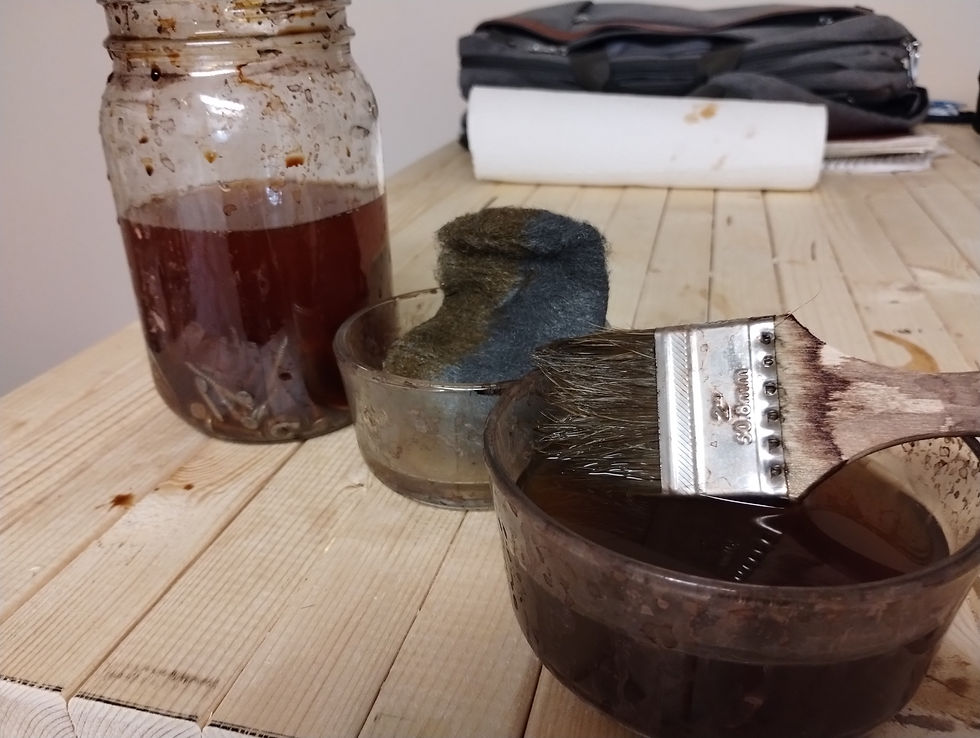
Stir your vinegar and steel wool solution well.
Use a clean brush to apply a light, even coat to your test piece.
Let it sit for 3–4 hours and monitor the color change.
If you’re happy with the tone, you’re ready to apply it to your main project.
For a darker effect, let the mixture age longer or apply a second coat.
For a lighter effect, dilute with more vinegar.
⚠️ Note: The color will continue to deepen over time. Once you find a color you love, document the time ratio and apply it as soon as possible to avoid over-aging.
How It Works – The Science Behind the Stain
The magic lies in a simple chemical reaction:
Iron oxide (rust) from the steel wool reacts with tannic acid in the wood.
The result is a permanent, natural-looking darkening effect.
Black tea boosts tannin levels in low-tannin woods, enabling the reaction.
The finish this creates is unlike any store-bought stain—rich, organic, and deeply textured.
Why We Love This Method
✅ Eco-friendly & Non-toxic
✅ Affordable & DIY-friendly
✅ Natural, authentic finish
✅ Customizable to your desired tone
This process gave our client's collapsible display ladder a stunning old-world feel—lightweight and fashionable, but rich with rustic charm, as if it had a story of its own.

Final Thoughts
Whether you're making a rustic shelf, an antique-style sign, or a handmade ladder like we did, this staining method offers an affordable, authentic alternative to modern finishes.
At Knoxville Custom Homes, we take pride in using eco-conscious, safe, and creative methods to bring character to our projects. If you're into DIY projects or home improvement, stick around for more tutorials, tips, and behind-the-scenes looks at what we're building next.
Follow us at https://www.instagram.com/knoxcustomhomes865/ and https://www.pinterest.com/knoxcustomhomes865/?actingBusinessId=1116752176258239494 for more custom home ideas, DIY techniques, and tips from the field.
Let’s keep building something beautiful—naturally.


Comments